Showing posts with label pinterest. Show all posts

Thursday, 9 May 2013

Jeans recycling and me

By far my most popular post was the one where I showed a few ways you could recycle a pair of jeans.
But I have a confession.
I only made a business card case from the list.
*hangs head in shame*
So I sought out new inspiration.
I added some new pins to my pinterest board and I got my craft on.

Upcycled jenas bucket bag   Source: ejhern on Etsy

Refashioned jeans bucket bagSouce: AnnaNimmity on Etsy


I was also in possession of a pair of outgrown jeans belonging to the Princess.

If you search on Pinterest for denim or jeans upcycling you will find pins of bags outnumbering other projects at a rate of at least 501 to 1-ish.

So I took my daughters jeans,


chopped them in half retaining the zip and hacked off a leg retaining the pockets,

 
turned the jeans inside out and sewed across the bottom and up the side.
I turned it the right way out again and fashioned a handle out of the leg I had cut off, attaching it at each side with several rows of stitching for strength.
By chance more than by design the handle is exactly the right length to be worn over one shoulder and also to be carried on her micro scooter.


I'm thinking a new line in upcycled jeans micro scooter accessories. Or is that too niche?

Do you have Obssessive Pinterest Disorder?
You may like to join in with Pinaddicts.


PinAddicts Challenge

Thursday, 18 April 2013

Spring clean to Spring craft

Spring is the traditional time for a mammoth clean up isn't it?
Except I don't do housework willingly, so instead I am having a mini Spring clear out starting with clothes.

I don't have an extensive wardrobe and much of it is very last season. Actually last season before last before that one. Staring into its depths my wardrobe only serves to taunt me with its tired shrugging shoulders (padded) and its lazy crumpled pleats (unironed). I have some classics that I have had for years but are now so worn that they are only useful for the Scouts rag bag collection, and some fashion disasters that will likely reside in a charity shop for months.

I made three piles.

Pile 1 - classics not threadbare and/or wear often.
Pile 2 - too challenging for even the best make do and mender.
Pile 3 - hasn't seen the light of day for years.

Pile 1 was refolded, hung on wooded hangers and replaced in the (now more spacious) wardrobe.
Pile 2 was sorted into two more piles. One consisted of fabrics I might use for crafting or sewing and buttons I can reuse. The other was bagged up for the Scouts.
Pile 3 is heading to the charity shop.

I have done the same with the Mr's shirts and the kids clothes too and this provided a rather opportunistic pile of fabric that shouted "Make something with me!!" So I did.

Shirts for upcycling


All over my Instagram feed I see quilters using shirt fabric for projects but not being a quilter I sought inspiration on Pinterest and came up with this.


Pinned from Not on the High Street
Credit: Not on the High Street


Three shirts, a bit of ribbon and a rummage through the button stash later, I knocked up this heart decoration.

Happy Home Happy Heart shirt upcycle

Happy Home, Happy Heart x

Linking to the Pinaddicts

PinAddicts Challenge


Tuesday, 5 June 2012

More Shabby Than Chic Bunting

I love the Pinaddicts challenge. It mashes up my love of crafting, with my secret addiction to pinterest, and blogging. What more could this girl want?

So this month, still clinging onto the sewing machine, and with the Jubilee in mind, I had a bash at bunting. Not the trickiest of projects I grant you but that was intentional. I seem to have a shortage of me-time at the moment so this needed to be crammed into an evening.

Here is my inspiration available from Pottymoos.com.

shabby chic union jack pendant


I had an old shirt from the Mr, a patchwork top I picked up for £1, some gingham ribbon for £2 and plain white tape for 60p from the market and I found a template from TheBigLunch.com. What I didn't have was any instructions. Could I be bothered to look? Nope. So I kind of bodged it like so.

More shabby than chic Bunting

Borrow a pair of pinking shears (Ouch! Pricey! So now on my Christmas list) and cut out 8 triangles of the patchwork fabric, and 8 of the shirt fabric for the backing. I figured the pinked edges would only add character to the bunting (and I could not be bothered to sew them and then turn them).

Then I measured and cut the gingham ribbon to form a Union Jack inspired cross.
I took the front piece of the bunting and zigzagged the ribbon down the length of the pendant pinking the ends.
Then I zigzagged the ribbon across, left to right.
Then top left to bottom right and finally top right to bottom left to make up the full cross.

Then I pinned the wrong sides of the front and back pieces of the pendant together and zigzagged all around.

It was at this point I realised I should have just cut the pendant pieces using straight scissors and only pinked the edges after each pendant was sewn toegther. That way I wouldn't have bits of ribbon hanging over the edges and have to try to cut them in a zigzag shape with regular scissors having given the pinking shears back and it being 10 o'clock at night. Doh.

Finally I positioned the pendants along the length  of tape ensuring that the gap between each one was the same and zigzagged each pendant onto the tape.

And there you have it. My more-shabby-than-chic Bunting.


Now for more craftiness inspired by pinterest, go to Simply Outnumbered who is hosting this months Pinaddicts extravaganza.


LifeAsIKnowIt


Tuesday, 8 May 2012

Recycled Business Card Case

A couple of weeks ago I had a very fanciful idea of making 25 things out of an old pair of jeans or two. I then whittled  it down to a shortlist of about 6. I then forgot all about it, distracted by life and family until last week when I remembered it was Pinaddicts time and I really wanted to get crafty.

So out of the short-shortlist I found this.


And this.


I find it really easy to be inspired to make something. And even easier to run out of motivation/energy so this was a bit of a rush job at the last minute (last night in fact). Subsequently I have failed to take any photos of the work in progress (candle light is so hard for photographers you know) but instead I found this handy little tutorial which give full instruction on the main construction elements.

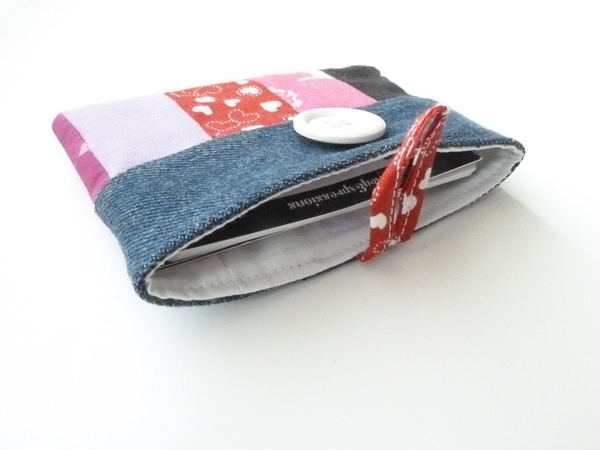
And here you are - the resulting recycled jeans business card case:

Recycled jeans business card case


The decoration started out as post it pad illustrations that I then interpreted for the sewing machine. I had an hour people so don't be too critical!!


However it gave me a little inspired lightbulb moment!

Who fancies a business card case for Britmums? I would have said Cybher but time is somewhat limited now!
I can knock one up for you from one of 3 designs for the not too princely sum of £6 + £1.50 p&p.

Design choices:

recycled jeans business card case


If you are interested, email me with your preferred design choice (cassette, camera or @), your name and address would be handy, and I'll send you paypal details for payment. I reckon (depending on demand *ahem*) I can get one to you in 5 working days.

The outer fabric will be denim but the inside lining material may vary depending on demand!

How cheeky am I?

And here are some other crafters that have been a bit busy interpreting their Pinterest finds for #Pinaddicts.


LifeAsIKnowIt

Thursday, 8 March 2012

From Sweater To Infinity Scarf

I cried. No, actually I sobbed.
My beloved wool tunic sweater accidentally slipped into the washing machine when I wasn't looking and fell out somewhat smaller than when it had gone in.
I got it in the January sales. It is was new!

After I had pulled myself together, researched 'unfelting my shrunken sweater' on google and come up with "Oh dear", I took heart in a couple of pins I had popped onto my #pinaddicts board thinking that they would make a good project one day.

Source: flickr.com via Alison on Pinterest


Suddenly I find myself with the raw material, i.e. my shrunken sweater.

I laid it out flat and attacked it with scissors to get 4 rectangles, two from the front and two from the back.


I am just going to pause for a second here to remark on how shrunken wool does not unravel or fray. Amazing! Apparently if you boil the stuff and then tumble dry it for good measure it can become very stiff and you can make allsorts from it. I wanted my shrunken sweater to remain soft, which it has, albeit a smaller soft than it was in its original form.


Taking 2 pieces, I oversewed the short edges together in a contrasting cotton, basically butted the edges together and zigzagged on the machine.


The wool tends to stretch a bit at the edges but that wouldn't particularly matter for the finished article I had in mind.

I joined all 4 pieces together along their short edges in a contiuous loop.

Taking inspiration from the felt pouch I'd pinned I started to free machine embroider a few wavy lines here and there.


Tada! One infinity scarf which I can wrap it two or three times around my neck.


At least my washing accident had a happy ending.

If you have any shrunken sweaters I really recommend this project. Really easy. Or go buy a wool sweater from a charity shop and put it on a hot wash!

The idea to pin and make came from a group of crafty ladies who collectively are known as #Pinaddicts
Pop over to Melsham Mum who is hosting the party this month for some other fabulous makes.


LifeAsIKnowIt

Monday, 6 February 2012

Amigurumi Goes Blogging

This story starts in the summer when I went to the Lincoln Antiques Fair and bought a sewing box, and contents for the princely sum of £5. A treasure trove of needles, cottons, rug making tools and crochet hooks. I vaguely remember having a go at crochet at school and quite liking it but failing miserably to make anything that didn't resemble an accident with a ball of wool and an over enthusiastic kitten.

Then at a craft evening at a friends house, I found in a pile of 'must have a go at that' craft books, "Amigurumi Friends". I found myself strangely drawn to these little knitted and crocheted creatures that obviously require years of formal training before you could even attempt to turn a ball of yarn with the help of some needles into anything recognisable.


Then came along My Love Bumps who set a challenge to set up a Pinterest board, pin crafty type things to it and then make something from your board.

Then I found this post on RedTedArt for a SIMPLE  (note how I have stressed the word simple) amigurumi teddy bear.

So what could be more natural than I pin that cute bear onto my board, dust off the crochet needle, get me some yarn and make like a Granny?

Here he is. The SIMPLE teddy bear, as posted by RedTedArt from Amieggs

amigurumi bear

Cute isn't he?

Well I had a go using some online 'how to' videos. You know, 'how to' tie a slip knot, how to make one crochet stitch, that kind of thing.

Casting on stitches, I have found, is the trickiest thing to do. Fiddly doesn't even cover it. I am not the most patient of people and I thought *cough* I could knock this little bear out in one evening. Yeah right. Five evenings later and I was finally stuffing the little f..ella.

So here is my crochet journey (edited) (heavily).

crochet casting on
Casting on, and on, and on...

Crochet single stitch
Crochet innit.

Crochet circle
Ta da! A doily! Bugger, it's supposed to be a bear's head!
I was actually amazed that it became a pleasant way to pass the time. I have ordered a slanket and matching tartan slippers now, you know, to complete the 'not quite old enough to be doing this but secretly enjoying it' look.

So it seems I may need a bit more practise, and patience. And I need to actually count stitches, learn to read a pattern, or at worst, look at the picture of what you are aiming to achieve and make adjustments accordingly, addressing anything that differs wildly.

But enough of this waffle. You are desperate to see the finished bear I know. So here he is.

Amigurumi Bear
Bugger the Bear.
Named Bugger, early on in his creation, as it was the first word he heard and learnt due to its frequent repetition. He may have been sewn together slightly oddly, in that his head found limbs attached to it so was therefore promoted to the position of body and his body/head may be missing a snout as is traditional for bears but on the whole, overlooking these minor adjustments, I think you will agree that Bugger is a lovely little fella and will be henceforth the FiveGoBlogging mascot :)

Amigurumi Bear
It's like looking in a mirror!
Now I'm sure that when you pop over to LoveBumps blog there will be more craftiness occurring.


LifeAsIKnowIt