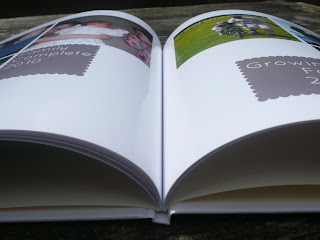
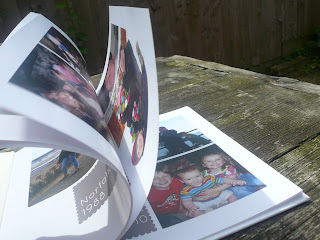
So what do you think I said to Pixum when they asked if I would like to create a photo book and then review it?
Youbetcha!
I am notoriously useless when it comes to doing anything with the photos I have taken. I have folders overflowing with GB's of photos on the desktop, even more on the laptop (which maybe why there is so little memeory left) and then just a few more on the backup disc drive. There may also be a suitcase full in the loft. Actually I know this to be a fact because I was up there blowing the dust of it to find some older pictures to put into my album.
It was our 10th wedding anniversary this year, and in lieu of a diamond I thought we could make a photo album of our 10 years together. And when I say 'we' I obviously mean me ;-)
I was offered this review back in February, with then 3 months notice before our wedding anniversary. Loads of time! NOT! It has taken 3 months to go through all the thousands of photos I have to find the 'right' ones. I didn't want to overfill the album, and I wanted to pick as many of us together as possible to show how we have grown
I also had to do it in secret because I wanted it to be a surprise. So 3 months wasn't quite enough and here I am 4 months later with a photo book.
You have to download the Pixum software onto your computer which is very simple and takes no effort. You then select the product that you want. There are a vast number of combinations to choose from like Large square, landscsape or portrait formats, hardcover or soft cover, paper type, and you can even use one of their themed designs for Christmas for example. Most formats start with 26 pages but you can add additional pages if you are struggling to whittle the photos down.
You then simply upload the images you want to use and drag and drop them into the album.
My TOP tip is to go through all your scattered images first and get them organised into one folder so you aren't having to skip about all over your folders to locate the right image. I also pre edited my pictures so that I knew I had already cropped or added a filter as I wanted.
By selecting the photo book format the blank pages are all laid out along the bottom of the screen. You can then choose the layout you would like for each page. So you may want 1, 2, 3 or more pictures on a page and you may want them all lined up straight or slightly tilted or overlapping. You can do all of these things to get the perfect look for your album. You can also select a background colour or effect for each page or even a background image on which your photos will be positioned.
You can start using the Pixum wizard to lead you through each step or just dive straight in which I did. To be honest I felt more in control going straight to the editor than using the wizard because the wizard felt like I was going to have to use a pre-set design which I didn't want to do.
I found it very easy to drag and drop my photos into the book and then adjust the size or position if I needed to. Like windows you drag the corners to size or the edges to move the image. Along the top of the screen is a toolbar which has many added gizmos to improve, design and edit your book further but one to take note of is on the photos toolbar. There is a face icon which changes from red to amber to green to indicate the quality of the image that will be printed. Your call but I adjusted the size of all of mine to get a green face. This ensured that they weren't pixelated at all and the best quality they could be.
There is also an auto-image correction button which means that the image is improved if necessary in production. This could be very handy!
With a little bit of playing I discovered that you can add text boxes. Small enough for a little label or big enough to write a paragraph. The font options are quite extensive too so you can achieve the look you are aiming for.
Getting the album to be as good as I felt I could get it did take time. No getting away from the fact that if you want a quality product you need to give it plenty of time to produce it. After the months of photo gathering, I then spent several hours editing the book. Exhausting work!
I must have proof checked it a dozen times. Spelling, the right order, the right photo! But the finished product arrived quickly and looks amazing. A real book!
Disclosure: Thank you Pixum for offering this picture book for free.
Pixum is the leading, independent and multiple award-winning online
photo service in Europe. Next to the free use of online albums and photo-sharing, Pixum offers inexpensive and professional lighting of digital photos on real photo paper and fun-products (e.g. mugs, puzzles, t-shirts, cards, calendars, frames and much more). Pixum produces 90% of the UK orders in the UK.


Wow. After all your detail, I was expecting a huge price tag! But you said the magic word- 'free'! Reminds me of Adam Sandler in 'Bedtime Stories' when he's on about the cherry red Ferrari 'For freeee'. Love it and thank you for a very informative blog. I shall be visiting them in the near future. x
ReplyDelete